
The road from password sprawl to single sign-on – and what I learned along the way.
I host a whole pile of services in my homelab. Photo management, files, document archive, media server, recipes, networking bits… the list is long and keeps growing.
Until now, all of those services have run largely independently of each other.
For me personally, the login handling was never much of a problem: my password manager (1Password) keeps the credentials, fills them in automatically, done. That’s a lot of services, a lot of accounts and a lot of passwords – but the handling is seamless and I barely notice it.
But: I’m not the only user. Some of the services are also used by Johanna, or by friends and family. A few small examples:
- Mealie – our recipe manager. It happily imports recipes from any website so you can keep them in one place – without the obligatory life story about the food blogger’s holiday. For example creamy coconut rice pudding with mango and lime (recipe in German).
- Bar Assistant – the cocktail database for the home bar. Which ingredients are in stock, what can I mix from them, what’s missing for the next shopping trip?
- Snapotter – a small but very handy image editing tool. Mostly used for AI-assisted background removal (upload image, background gone, done). Exactly the kind of tool you need two or three times a month, but for which you don’t want a cloud service with a mandatory account and a subscription – and no extra software installed either.
And that’s where the problem starts: for every one of these services, each user needs their own account and their own password. Add the respective (sub-)domain on top, and every service comes with its own little „how did that go again?“ package…
But I don’t want to ask anyone to memorise separate credentials for the recipe database, the cocktail menu and the image editor. And besides: when I set up a new service, I want to be able to enable it for Johanna or anyone else with a single click – without a new account, without a new password, without „I’ll send you the credentials on WhatsApp“.
The solution has been around for decades and almost everyone uses it daily without thinking about it: Single sign-on (SSO). Log in once, centrally, then use every service you’ve been granted. Exactly what „Log in with Google/Apple/Facebook“ does – only self-hosted, on my own services, and without a cloud giant reading along.
Authentik as the bouncer

After some research I went with Authentik – a self-hosted identity provider that has been running on its own subdomain here ever since, playing bouncer for (almost) all my services.
Why Authentik?
- Protocol variety: OIDC/OAuth2, SAML, LDAP, RADIUS, SCIM – whatever a service speaks, Authentik probably supports it too. That’s worth its weight in gold in a homelab, because the most varied services unfortunately all want to be connected differently.
- Forward auth: this one really is a game changer. Many (especially smaller) self-hosted tools have no user management of their own, or only a very rudimentary one. Combined with a reverse proxy, Authentik can simply sit in front of the service: whoever isn’t logged in doesn’t even get to the door. That way you can also secure services that have no clue about SSO – like the Snapotter mentioned above. How exactly that works is something I’ll tackle in a post of its own soon.
- Per-app access control via groups: every service is an „application“ in Authentik, and every application has a policy attached that decides who gets to see it. In my setup there are essentially three groups: an admin group (just me), a family-shared group (the two of us) and a friends-shared group (family, friends and acquaintances). Enabling a service for Johanna therefore comes down to this: change the group on the service binding, with one click. No new account, no new password.
- Huge integration library: for what feels like every better-known self-hosted service there’s an official guide. It isn’t always 100 percent accurate (more on that below), but it’s a very good starting point.
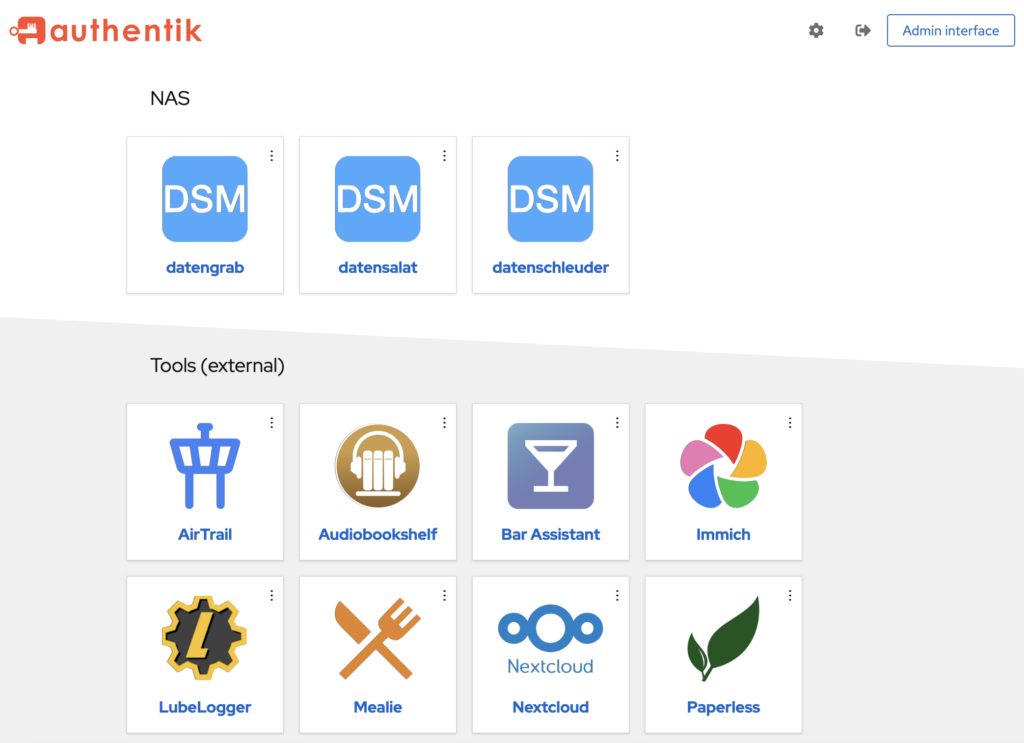
On the user side, everyone gets their own app overview: after logging in you see exactly the services that have been enabled for you – as clickable tiles.
The downsides
Alongside all the positives, there are drawbacks too:
- It’s hungry. Server, worker, PostgreSQL, Redis – the stack does want a bit of RAM. To secure three or four services you’re probably better off with something leaner.
- The learning curve is steep. What exactly are flows, stages, policies, providers, applications and outposts in Authentik? You’ll have to chew your way through that while setting up the first service or two. After that it becomes routine.
- Single point of failure. If the identity provider hangs, potentially everything hangs. More on that below – keyword „break glass accounts“.
A quick word on the alternatives I looked at (and rejected):
- Keycloak is what I’ve seen everywhere in the enterprise world. It can do everything, and it feels like it – in my opinion overkill for a homelab, with a poorer documentation situation for typical self-hosted services.
- I had my eye on Authelia – it’s considerably leaner, but it’s managed exclusively through configuration files and comes without an admin UI or app library. That’s great if you want „configuration as code“, but on top of that I did want the graphical „enable with one click“ for myself.
- Pocket ID is a nice, minimalist passkey-only IdP. The drawback for me is that it only does OIDC – no SAML, no LDAP, no forward auth. If you only have OIDC-capable services, it’s surely great.
Lessons from practice
By now a good three dozen services sit behind Authentik – from photo management (Immich) through Proxmox to my NAS logins (Synology).
A few things I learned along the way (each of which cost me somewhere between ten minutes and an entire evening of my life):
- Check the redirect URI. Character by character, without a trailing slash (or with one – depending on what the service happens to send), matching set to „strict“. Nine out of ten errors during setup were redirect URIs that didn’t match exactly. Tip: just read the
redirect_uri=parameter from the address bar in your browser to see what the service actually sends, instead of relying on the docs alone. - Set only a signing key on the provider, no encryption key. Most services can’t do anything with encrypted tokens and acknowledge this with such wonderful error messages as „found 5 parts“. That was my second most common stumbling block.
- Align email addresses first, then enable SSO. Most services match the SSO login to existing accounts via the email address. Awkward for me, since in the past I usually set up my accounts in the format
service@my-domain. If you don’t align that beforehand, you end up with two accounts afterwards – the old one with all the data, and a fresh, empty SSO account. Some services match on the username instead. A look at the docs beforehand is helpful here…

- Always keep a break-glass account. On every service I keep the local admin login in place. When Authentik (or DNS, or the reverse proxy…) plays up, I don’t want to be locked out completely – especially not on the DNS server or the monitoring.
- Not every service can (or may). Stirling-PDF put native OIDC behind a paid licence 👎, on Uptime Kuma the OIDC support has been stuck in a vibe-coded pull request for months, and Umami simply rejects SSO upstream. For cases like these: put forward auth in front of them, or deliberately let them run in isolation.
- Forward auth and API clients don’t get along. Mobile apps that access a service via API key trip over the login redirect. Those run over VPN straight to the service here instead. Works fine – but good to know before you start wondering.
Conclusion
Was all this strictly necessary? For me alone: probably not, 1Password would have carried on doing the job just fine.
But as soon as more than one person uses the homelab, things look rather different. „Just log in with your account and you’ll see everything that’s been enabled for you“ is a fundamentally better onboarding than „let me create an account for you on five services and send you the passwords“.
The rollout isn’t 100% finished – a few services are still waiting to be hooked up to forward auth, and the onboarding for all users is still pending. But the foundation is in place.
That moment when you enable a freshly set-up service for all users with a single group binding – without creating a single new account – is pretty satisfying.
This post was originally published in German on July 13, 2026.
The original post can be found here: Einer für alle: SSO im Homelab mit Authentik.